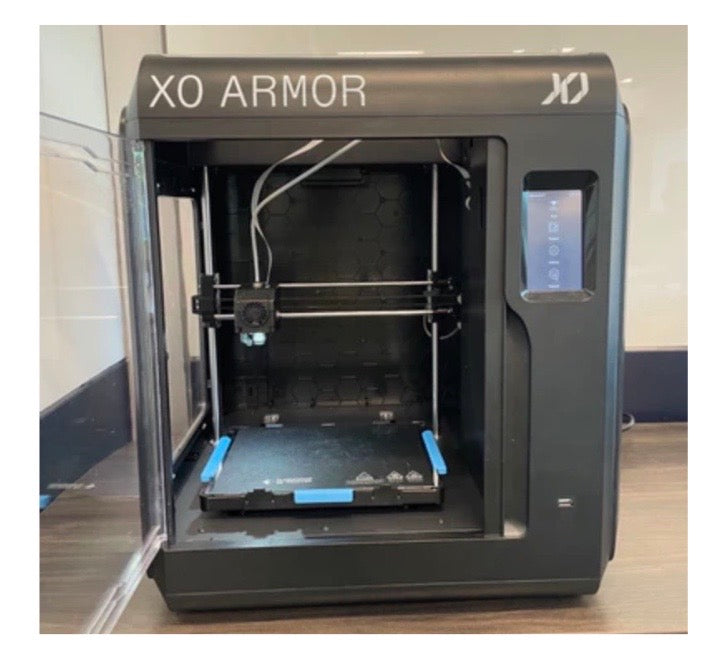
Make the most of your Xo Armor 3D printer
The era of 3D printing is here. The emergence of 3D printers has created a paradigm shift in numerous sectors, especially in the medical field. Tailored medical equipment and patient-specific solutions, which were previously unfeasible or excessively expensive, are now widely accessible. This revolution helps democratize healthcare and sets new standards for medical treatments globally.
Successful 3D printing is not challenging. Following some simple guidance will help with your success. For an XO Armor 3D printer, we share 8 essential tips for beginners entering the world of FDM* printing.
*FDM stands for fused deposition modeling (FDM), also known as fused filament fabrication (FFF), is the most widely used type of 3D printing at the consumer level.
1. Print on a stable surface.
Bring the box near the location where you intend to keep the printer. Make sure the surface you choose is flat and sturdy. Vibrations and wobbling can ruin prints. Find a place near a power outlet and make it accessible to the internet – within the range of Wi-Fi or near an ethernet connection.
The printer can be awkward to unbox, so cut the box along the corners from top to bottom using the included box cutter and remove the printer with two people (when possible).
2. Level the print bed.
After plugging in your unit, look for the options on your printer controls labeled, "Bed Leveling," "Level Corners," and "Bed Tramming." These settings allow the printer to move across the bed's four corners while you modify the springs below.

Print bed: this is perfectly flat, textured surface that gives the printer a consistent foundation to build your part on. This print bed is removable and flexible to help you more easily remove parts printed on it.
Start by heating the nozzle and the bed, as you would when preparing for a print. Metals expand a bit when heated, so it's important to calibrate when the machine is warm. Let the printer heat for several minutes. Then, slip an ordinary sheet of paper beneath the nozzle. Adjust the nozzle's height until it lightly touches the paper.

*Nozzle (on the left in the illustration): this is the part of the printer that gets hot enough to melt the filament (around 220° C or 425° F). Always make sure the nozzle is cool before touching it.
**Print head (on the right in the illustration): this is the part of the printer that holds the nozzle. This is moved around by the printer to deposit plastic where it's needed on each layer of the part.
Next, home your printer. This takes it to the 0,0,0 position.
Check your printer controls for something called Bed Leveling, Level Corners or Bed Tramming. This option will move the printer around the four corners of the bed while you adjust the springs underneath.
3. Properly load filament.
The best approach is to use the touch screen to navigate to Prepare > Filament > Load. Then, remove the shrink wrap and tape from a new spool of filament.

While maintaining tension in the spool, cut off the last few millimeters of filament at an angle using the snips included in your XO Armor supply box. Keep tension in the filament by holding the filament on the spool side, not by the piece you are removing. Maintain this tension until the filament is installed to prevent tangles. Open the filament door on the right side of the printer and place the spool with the filament end on the left, feeding from the bottom of the spool up towards the yellow arrow. Follow the on-screen instructions to finish loading the filament.
Tip 1: Use the snips to cut off the filament's last 6-12 inches. Cut it near a 45-degree angle.
Tip 2: If your spool develops a knot, the filament will stop feeding through the printer and cause a fail. Prevent tangles by never allowing the spool to uncoil. When handling, keep one hand on the filament, and secure its end with tape to prevent unwinding. Masking tape is recommended because it is easy to remove and does not leave a sticky residue.
XO Armor uses the improved formula of PLA as the filament for 3D printing because it’s the easiest to work with and is made from a biodegradable material. It does not readily absorb moisture, so you don’t need to worry about keeping it sealed in airtight containers. Another advantage of this filament and possibly the most important is the great performance of the resulting printed protective device. You are invited to review our article for in depth information on this key topic.

4. Changing the filament.
If you determine that you do not have a sufficient supply of filament for your next print job installed, the existing filament needs first to be removed. Navigate to Prepare> Filament > Change.
Tip: Each spool weighs 1 kg. Based on the size of your printed parts, you might need a new spool after every 10 to 30 prints.
The printer should be heated up to operating temperature, and then the existing filament should be ejected. Roll the excess filament up onto the spool and remove it from the printer. The process is similar to reloading ink in your desktop printer.
5. Print a test model.
Use the touch screen to navigate to Build > Local Files and select the file named “Startup.” Then, select the icon named “Build.” The printer may take several minutes to heat up before the file begins printing. Once completed, asses the stitching on the part.
Making a test print on a 3D printer is essential for several reasons:
🔲 Calibration Check: It ensures that the printer is calibrated correctly. Calibration is vital for the precision and accuracy of the printed object.
🔲 Quality Assurance: It allows you to check the overall print quality, ensuring no inconsistencies, warping, or other issues.
🔲 Adhesion Verification: It confirms that the first layer adheres properly to the print bed, which is critical for the success of subsequent layers.
🔲 Extruder Performance: A test print can identify any issues with the extruder, such as clogging or inconsistent filament feed rates. If you're unsure about the print's performance, quality, or structure, please contact XO Armor support for further assessment.
6. Maintain a clean bed print.
A clean print surface is crucial for good adhesion. Skin oils and certain PLA additives can leave residues that affect the first layer's sticking. Clean the surface with 91% isopropyl alcohol whenever there is a need.
7. Improve adhesion if necessary.
If adhesion remains an issue, apply a thin layer of washable glue stick (preferably the purple type), to the warm print surface for enhanced grip. Due to insufficient adhesion, the entire cast can shift during printing, leading to misalignment and a skewed cast.
8. Keep your nozzles clean and swap out as necessary.
A worn nozzle affects print calibrations and can get clogged by debris and overcooked plastic. Signs of a deteriorating nozzle include gaps in prints or excessive stringing. If the filament doesn't flow straight when pushed through, it's time for a nozzle replacement. Additionally, maintain the nozzle's exterior by removing stray filaments. Clean it while hot using a wooden craft stick or brass brush.
As you can see, working with the XO Armor printer is straightforward, allowing you to produce numerous componets with ease. By following the tips we've shared, this 3D printer will undoubtedly become an invaluable tool in delivering exceptional patient-centric care.


